
This can be used to save some money for domain forwarding at different providers.
You need to take the following steps to make the domain forwarding work correctly.
I am not going to take all the steps, you add the domain with the Free plan.
When you add the DNS records you need to set it as on the following image:

Explanation:
192.0.2.1 for the A record, which allows Cloudflare to apply rules and redirects without routing traffic to an origin server .192.0.2.1 and set to proxied status.After adding these DNS records you need to change the Nameservers at your domain register.
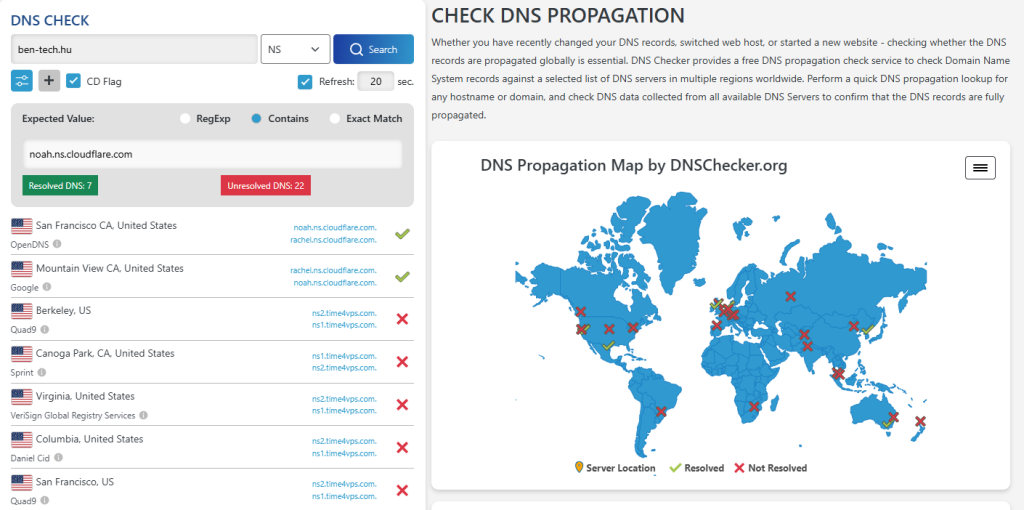
These nameservers are different for your account so use yours then check the change with the DNSChecker tool.
The DNS propagation can take up to 24h or more.
You can set this without waiting for the full DNS propagation.
example.com/* to match all URLs on the domain.301 - Permanent Redirect or 302 - Temporary Redirect.https://newdomain.com/$2 to forward all paths and queries to the new domain.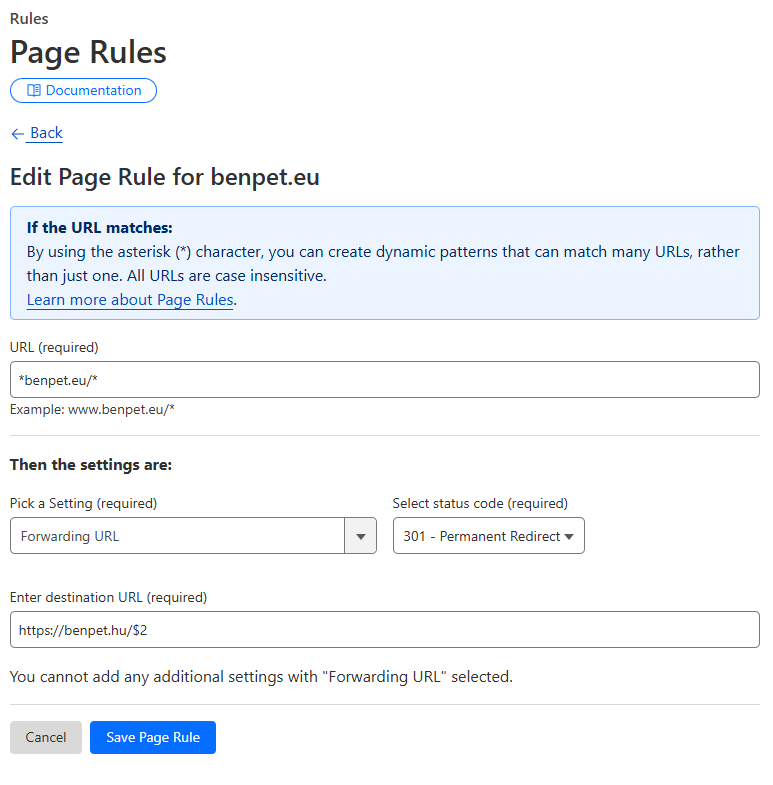
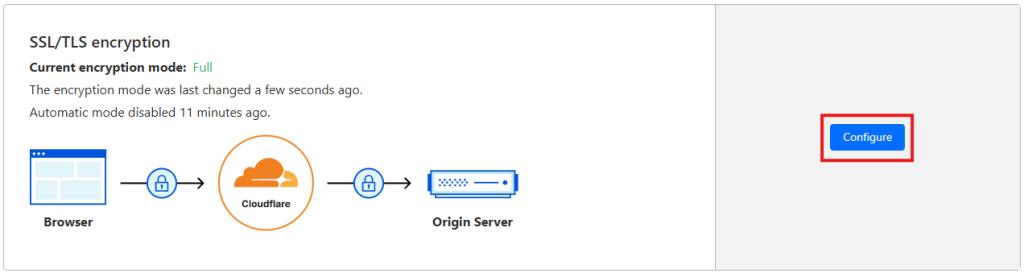
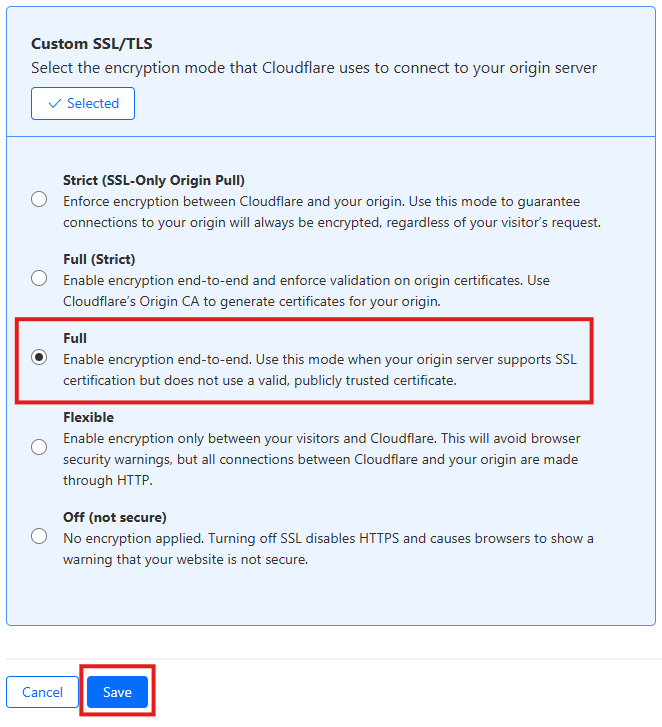
After setting the Page Rule for the redirection you also need to change the SSL/TLS from Flexible to Full.
If you don’t do that you are going to get an error when testing the domain in the browser:
You can just open a browser and check if the redirection is working after DNS is propagated.
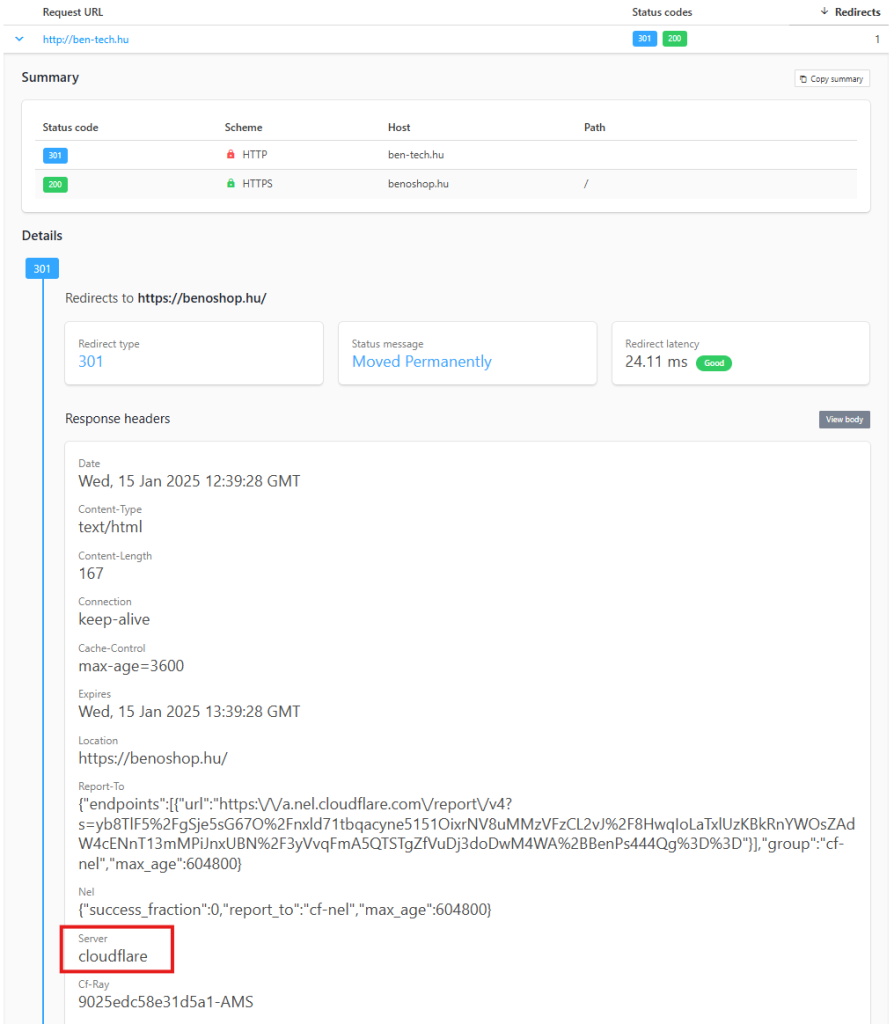
You can also use a tool like https://httpstatus.io/ which will test the redirection chain.

Where you can see that the redirection is working correctly and the domain is redirected to benoshop.hu.
You can also see that the Server is cloudflare which means that the request is managed by Cloudflare now correctly.
By following these steps, you can effectively use Cloudflare to forward one domain to another, ensuring that all traffic is seamlessly redirected to the new destination.